Are you a fan of remote control helicopters and looking for some exciting projects to try at home? Well, look no further! In this article, we will present to you the top three DIY RC heli projects that will keep you entertained and challenged. From building your own helicopter from scratch to transforming an existing toy into a high-performance machine, these projects will test your skills and creativity. So, get ready to take flight and embark on an exciting journey in the world of DIY RC helis!
Overview of DIY RC Heli Projects
Introduction to DIY RC Heli Projects
If you are a fan of remote-controlled helicopters and have a knack for building things, then DIY RC heli projects are perfect for you. These projects allow you to design, build, and customize your own RC helicopters from scratch or by upgrading existing models. Whether you are a novice or an experienced hobbyist, DIY RC heli projects offer a great opportunity to explore your creativity, learn new skills, and have a thrilling flying experience.
Benefits of Building DIY RC Helis
There are several benefits to building DIY RC helicopters. Firstly, it allows you to have complete control over the design and functionality of your helicopter. You can choose the components, materials, and features that best suit your preferences and flying style. Secondly, building a DIY project gives you a sense of accomplishment and satisfaction that comes with creating something with your own hands. It also provides a deeper understanding of the mechanics and electronics involved in RC helicopters. Lastly, DIY projects often cost less than buying pre-built models, making it a more affordable option for enthusiasts.
Basic Components Required
Before diving into specific DIY projects, it is essential to familiarize yourself with the basic components required for building an RC helicopter. These components include a frame or chassis, motors, propellers, flight controller, remote controller, receiver, batteries, electronic speed controllers (ESC), and various wiring and electronic connections. Understanding the purpose of each component will help you make informed decisions during the project and ensure a successful build.
Safety Precautions
While DIY RC heli projects can be exciting, it is crucial to prioritize safety throughout the process. Make sure to follow safety guidelines and wear protective gear, especially during the assembling and testing phases. Additionally, be cautious when handling sharp tools and working with electrical components. Always read the instruction manuals and take appropriate measures to prevent accidents or damage to yourself and others.

Project 1 – Building a Mini Quadcopter
Introduction to Mini Quadcopters
Mini quadcopters, also known as micro quadcopters, are small-sized, agile, and versatile RC helicopters. These quadcopters are perfect for beginners and those looking for a compact and portable flying experience. Building a mini quadcopter from scratch allows you to customize its features and performance according to your preferences.
Required Tools and Materials
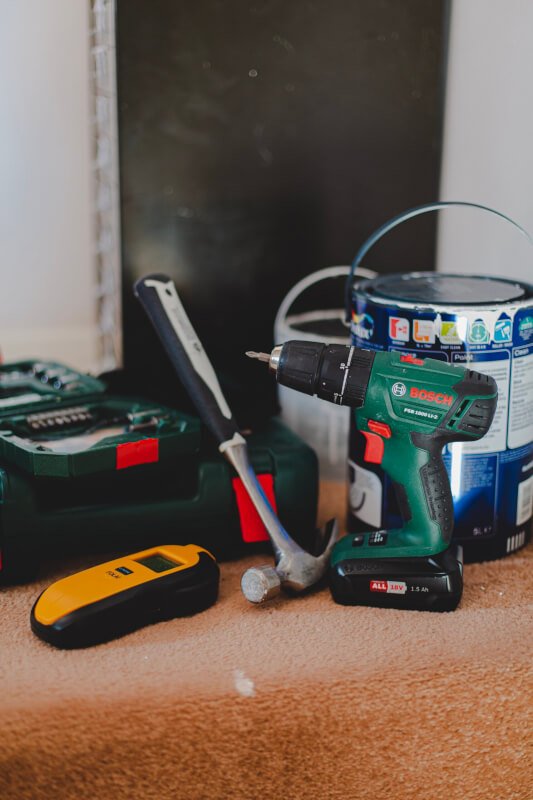
To build a mini quadcopter, you will need a few essential tools such as a soldering iron, wire cutters, pliers, screwdrivers, and heat shrink tubing. In terms of materials, you will require a mini quadcopter frame kit, brushless motors, propellers, flight controller board, ESCs, radio transmitter, receiver, and a LiPo battery.
Step 1: Frame Selection and Assembly
Start by selecting a mini quadcopter frame kit that suits your flying style and preferences. Once you have the frame, follow the assembly instructions to securely attach the motors, ESCs, and the flight controller. Make sure all the components are correctly aligned and firmly attached to ensure stable flight.
Step 2: Installing the Flight Controller
The flight controller is the brain of your mini quadcopter, responsible for stabilizing and controlling its movements. Mount the flight controller onto the frame following the manufacturer’s instructions. Take care to properly connect the required cables between the flight controller and other components like the ESCs, receiver, and power distribution board.
Step 3: Adding Motors and Propellers
Install the brushless motors onto the frame using the provided motor mounts or screws. Make sure to attach the right motor to the corresponding arm of the frame. Then, attach the propellers to each motor, ensuring they are securely fastened.
Step 4: Wiring and Electronic Connections
Carefully connect the necessary wires and cables between the flight controller, ESCs, receiver, and other components. Double-check the connections to ensure they are correctly soldered and insulated using heat shrink tubing. Proper wiring is crucial for the smooth operation of your mini quadcopter.
Step 5: Configuring the Remote Controller
Follow the instructions provided with your remote controller to set it up and bind it with the receiver. Configure the controller settings according to your preference, such as throttle response, flight modes, and transmitter range. This step allows you to have full control of your mini quadcopter during flight.
Step 6: Testing and Troubleshooting
Before taking your mini quadcopter for its first flight, make sure to thoroughly test all its components and systems. Perform a pre-flight checklist, checking for any loose connections, unusual vibrations, or abnormal behavior. Troubleshoot and fix any issues identified during the testing phase.
Tips for Flying and Maintenance
Once your mini quadcopter is up and running, it is essential to practice safe flying techniques. Begin with basic maneuvers and gradually progress to more complex ones. Regularly inspect and maintain your mini quadcopter, including checking the battery voltage, motor performance, and propeller conditions. This maintenance routine will ensure the longevity and reliability of your mini quadcopter.
Conclusion and Further Enhancements
Congratulations on successfully building your mini quadcopter! Enjoy the thrill of flying your creation and explore the endless possibilities for customization and enhancement. Consider adding additional features like LED lights, a camera, or even a GPS system to further enhance your flying experience. The journey of DIY RC heli projects has just begun, and the sky’s the limit!

Project 2 – Upgrading an Existing RC Helicopter
Introduction to Upgrading RC Helicopters
If you already have an RC helicopter but want to improve its performance and capabilities, upgrading it is a fantastic option. Upgrading allows you to enhance its motor power, stability, control, and overall flying experience. It also gives you the opportunity to personalize and customize the appearance of your RC helicopter.
Required Tools and Materials
To upgrade an existing RC helicopter, you will need some basic tools such as screwdrivers, pliers, wire cutters, a soldering iron, and heat shrink tubing. Additionally, you will require upgrade components like new motors, batteries, receiver, gyro stabilization system, and optional accessories for customization.
Step 1: Assessing the Existing Helicopter
Start by thoroughly assessing your existing RC helicopter. Identify its strengths, weaknesses, and areas where it requires improvement. Take note of the current motor power, battery life, stability, and control responsiveness. This evaluation will help you determine the specific upgrades needed for your helicopter.
Step 2: Upgrading the Motors and Batteries
One of the most significant upgrades you can make is to replace the existing motors with higher-powered ones. Choose motors that are compatible with your helicopter model and offer improved performance. Additionally, upgrading the batteries to higher-capacity or LiPo batteries can give your helicopter longer flight times and increased power.
Step 3: Enhancing the Controller and Receiver
Consider upgrading the transmitter and receiver system of your RC helicopter. Look for a transmitter with better range, more channels, and improved control features. Similarly, update the receiver to a more advanced and responsive model to ensure seamless communication between the transmitter and the helicopter.
Step 4: Adding Gyro Stabilization
Installing a gyro stabilization system can greatly improve the stability and control of your RC helicopter. This system helps counteract unwanted movements and vibrations, making your helicopter easier to handle during flight. Carefully follow the instructions provided with the gyro stabilization system to integrate it into your helicopter.
Step 5: Customizing the Appearance
Personalize the appearance of your upgraded RC helicopter by adding custom stickers, paint, or other visual modifications. Let your creativity shine by selecting colors and designs that reflect your personality or match your flying style. This step allows you to make your helicopter one-of-a-kind and visually appealing.
Step 6: Testing and Calibration
Before taking your upgraded RC helicopter for a flight, perform thorough testing and calibration. Ensure that all the upgraded components are functioning correctly and properly integrated into the helicopter. Fine-tune the settings and calibration as needed to achieve the desired performance and stability.
Tips for Efficient Flights and Durability
After upgrading your RC helicopter, it is essential to practice efficient flying techniques. Avoid aggressive maneuvers and gradually push the limits as you become more comfortable with the upgraded performance. Regularly inspect and maintain the helicopter, checking for any loose connections, damaged parts, or signs of wear. Proper maintenance will ensure the longevity and durability of your upgraded RC helicopter.
Conclusion and Future Modifications
By upgrading your existing RC helicopter, you have breathed new life into it and taken its performance to the next level. Enjoy the improved maneuverability, control, and stability as you explore the skies. Consider future modifications or upgrades to further enhance your helicopter’s capabilities and continue the joy of DIY RC heli projects.


