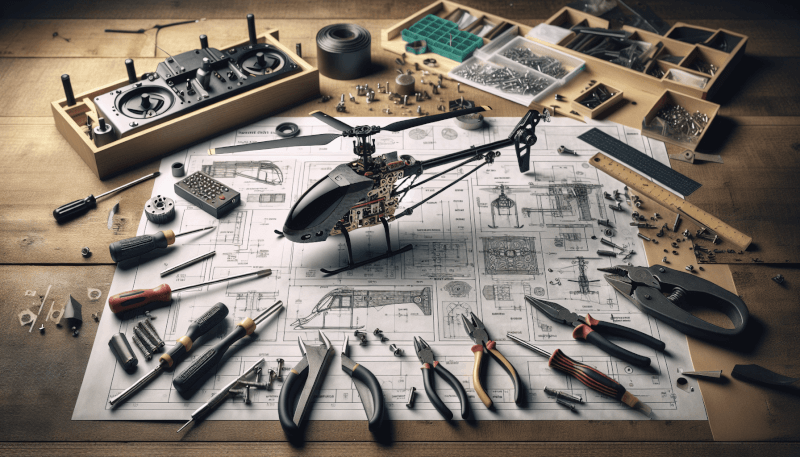
If you’re an avid RC helicopter enthusiast looking to take your hobby to the next level, then building your own custom landing gear is the perfect project for you. Whether you’re a beginner or a seasoned expert, customizing your RC helicopter landing gear allows you to add a personal touch and enhance both the performance and aesthetics of your aircraft. In this article, we will guide you through the step-by-step process of building your own custom landing gear, providing you with expert tips and tricks along the way. Get ready to elevate your RC helicopter experience with a landing gear that is uniquely yours.
1. Understand the Basics of RC Helicopter Landing Gear
If you are looking to enhance the performance and customization of your RC helicopter, building your own custom landing gear is a great place to start. The landing gear serves as a critical component that not only provides stability during takeoff and landing but also protects the valuable electronics and other parts of your helicopter. Before diving into the building process, it is essential to understand the basics of RC helicopter landing gear.
1.1 Types of RC Helicopter Landing Gear
There are various types of landing gear available for RC helicopters, and each type serves a specific purpose. The most common types include:
Skid Landing Gear: Skids consist of two parallel poles that extend from the main helicopter frame. They offer simplicity and lightness in design and are suitable for lighter helicopters and beginners.
Skid Clamps: Skid clamps are an alternative to traditional skids and allow for easy adjustment of the landing gear’s height.
Strut Landing Gear: These landing gears feature one or more struts that connect the skids to the main helicopter frame. Strut landing gears provide additional stability and are commonly found on larger helicopters.
Retractable Landing Gear: Retractable landing gears can be raised and lowered during flight and are often found on more advanced and larger-scale RC helicopters.
1.2 Importance of Custom Landing Gear
While there are pre-manufactured landing gears available in the market, custom landing gear offers several advantages. Customization allows you to optimize the landing gear’s height, width, and weight to match your specific helicopter and flying style. Additionally, custom landing gear can be designed to accommodate additional features such as shock absorption mechanisms, camera mounts, or payload carriers. Building your own landing gear also provides a sense of satisfaction and accomplishment.
1.3 Factors to Consider Before Building
Before you start building your custom landing gear, consider the following factors:
Weight and Balance: The landing gear’s weight and placement can significantly affect the helicopter’s overall balance. Ensure that your design maintains a proper center of gravity and does not compromise stability.
Landing Surface: Consider the type of surface you will be landing on most frequently. Harder surfaces may require a different design compared to soft or uneven terrain.
Durability and Strength: Choose materials that are strong and durable enough to withstand the impact and stress during landings. Take into account the size and weight of your helicopter when selecting suitable materials.
2. Gather Required Tools and Materials
To begin building your custom landing gear, gather the necessary tools and materials. Having the right tools will make the construction process more efficient and enjoyable.
2.1 Tools for Building Custom Landing Gear
Here are some essential tools you will need:
Drill: A drill with various drill bit sizes will be required for creating holes in the mounting brackets and legs.
Screwdriver Set: A set of screwdrivers, including both Phillips and flathead, will be necessary for tightening screws and other fasteners.
Pliers: Pliers come in handy for gripping and bending wire or other small components.
Saw: Depending on the materials you choose, a saw may be required to cut and shape the landing gear components.
Sandpaper: Sandpaper of various grits will be needed for smoothing and finishing the edges of the landing gear.
2.2 Materials for Custom Landing Gear
The choice of materials depends on factors such as the weight and strength requirements of your helicopter. Popular materials for RC helicopter landing gear include:
Carbon Fiber: Carbon fiber is lightweight, strong, and offers excellent rigidity. It is commonly used in high-performance RC helicopters due to its durability.
Aluminum: Aluminum landing gear provides a balance between strength and weight. It is widely available and can be easily shaped and machined.
Wood: Wood is a cost-effective option and suitable for lighter helicopters. However, it is generally less durable and may require regular maintenance.
Plastic: Some landing gears are made of high-quality plastic materials that offer a good balance of weight and strength. Plastic landing gears are often found in beginner-level helicopters.
Once you have gathered all the required tools and materials, you can move on to the next step of measuring and designing your landing gear specifications.
3. Measure and Design Landing Gear Specifications
Before cutting any materials, it is important to have a clear plan and design for your landing gear. This will ensure that the final product meets your requirements and fits your RC helicopter perfectly.
3.1 Determine Desired Height and Width
Consider the height and width requirements of your RC helicopter. The ideal height will depend on the size and weight of your helicopter, as well as the type of terrain you’ll be operating on. Measure the distance between your helicopter’s landing skids or mounting points to determine the width of the landing gear.
3.2 Sketch or Use a CAD Software for Design
Sketch out your landing gear design on paper, or if you have access to a computer-aided design (CAD) software, create a 3D model of the landing gear. This will help you visualize the final product and make any necessary adjustments before beginning construction.
3.3 Consider Weight and Balance Factors
Ensure that your design takes into account the weight and balance of your RC helicopter. Calculate the weight of the landing gear components and consider how they will affect the center of gravity. It is essential to maintain proper balance to ensure stable flight and precise control.
4. Select and Prepare Suitable Materials
Once your landing gear design is finalized, it is time to select suitable materials and prepare them for construction.
4.1 Choose Material Type (Carbon Fiber, Aluminum, etc.)
Refer to the material options mentioned earlier and select the one that best suits your requirements. Consider factors such as weight, strength, durability, and availability. Measure and mark the dimensions of the landing gear components on the chosen material before cutting.
4.2 Cut and Shape Material According to Design
Using a saw or appropriate cutting tool, carefully cut the material according to the measurements and design you have established. Take your time to ensure precise cuts and smooth edges.
4.3 Sand and Smooth the Edges
After cutting the material, use sandpaper of various grits to sand and smooth the edges of the landing gear components. This will remove any sharp or uneven edges, preventing injury and ensuring a professional finish.
5. Assemble the Landing Gear Components
Now that you have prepared the materials, it’s time to assemble the landing gear components.
5.1 Drill Holes for Mounting
Using your drill and the appropriate drill bit size, carefully drill holes in the main mounting brackets and legs. Ensure the holes align with the landing gear attachment points on your RC helicopter.
5.2 Attach Legs to Main Mounting Bracket
Secure the legs to the main mounting bracket using screws or other fasteners. Ensure that the legs are properly aligned and securely attached to prevent any wobbling or instability during flight.
5.3 Reinforce Joints with Epoxy or Glue
For added strength and durability, apply epoxy or glue to the joints where the legs and mounting brackets meet. This will reinforce the connection and help prevent any loosening or separation during flight.
5.4 Install Shock Absorption Mechanism (Optional)
If your landing gear design includes a shock absorption mechanism, now is the time to install it. Follow the manufacturer’s instructions or your own design specifications to properly attach the shock absorbers to the landing gear. This will help minimize the impact of hard landings and provide additional protection for your helicopter’s components.
6. Test and Adjust the Landing Gear
With the landing gear assembled, it’s essential to test and make any necessary adjustments to ensure optimal performance.
6.1 Perform Weight and Balance Check
Double-check the weight and balance of your RC helicopter with the newly installed landing gear. Make any adjustments to the attachment points or components as needed, ensuring that the center of gravity remains within the recommended range.
6.2 Ensure Proper Alignment and Stability
Test the landing gear’s alignment by placing your RC helicopter on a level surface. Observe whether the landing gear sits evenly and provides stable support. If any adjustments are required, carefully make them to achieve proper alignment.
6.3 Make Adjustments as Required
During initial flights, observe the behavior of your RC helicopter’s landing gear closely. Take note of any issues related to stability, balance, or landing performance. Make adjustments to the landing gear if necessary, considering factors such as weight distribution, shock absorption, and overall handling.
7. Add Additional Features or Modifications
Now that you have a functional landing gear in place, you may want to consider adding some additional features or modifications to enhance your RC helicopter’s capabilities.
7.1 Consider Skids or Wheels for Different Surfaces
If you often operate your RC helicopter on a variety of surfaces, consider adding skids or wheels to your landing gear. Skids are ideal for landing on grass, while wheels provide better mobility on harder surfaces such as pavement or concrete.
7.2 Install LED Lights for Visibility
To enhance the visibility of your RC helicopter during flights, consider installing LED lights on the landing gear. These lights can be programmed to flash or change colors, making your helicopter more easily visible during low-light conditions.
7.3 Implement Retractable Landing Gear Feature
For a more professional and sleek look, you may want to incorporate a retractable landing gear feature. This allows the landing gear to be raised and concealed during flight, providing a cleaner aerodynamic profile.
7.4 Incorporate Camera Mounts or Payload Carriers
If you enjoy aerial photography or videography, consider adding camera mounts or payload carriers to your landing gear. These additions will allow you to easily attach cameras or other equipment to capture stunning footage from your RC helicopter.
8. Test and Fine-Tune Your Custom Landing Gear
After making any additional modifications or additions, it is crucial to test and fine-tune your custom landing gear for optimal performance.
8.1 Conduct Ground Testing
Perform ground tests by gently landing your RC helicopter multiple times on various surfaces. Observe how the landing gear absorbs shocks and impacts, and check for any vibrations or instability.
8.2 Evaluate Performance during Takeoff and Landing
During actual flights, pay close attention to how the custom landing gear performs during takeoff and landing maneuvers. Ensure that the landing gear remains stable and does not interfere with the helicopter’s overall performance or control.
8.3 Make Further Adjustments if Necessary
If you encounter any issues or areas for improvement, make further adjustments to your custom landing gear design. This may involve addressing stability concerns, weight distribution, or any other factors that impact overall performance.

9. Paint or Customize the Landing Gear
Once you are satisfied with the functionality and performance of your custom landing gear, you can add the finishing touches by painting or customizing its appearance.
9.1 Choose Desired Color or Design
Consider the overall aesthetics of your RC helicopter and select a color or design that complements its look. You can choose a color that matches your helicopter’s body, or opt for a contrasting color for added visual appeal.
9.2 Use Appropriate Paint or Decals
Select high-quality spray paints or specialized RC model paints that adhere well to the chosen material of your landing gear. Follow the manufacturer’s instructions for application and allow sufficient drying time between coats.
Alternatively, you may choose to use decals or stickers to add unique designs, logos, or patterns to your landing gear. These can be a fun and creative way to personalize your RC helicopter.
9.3 Apply Clear Coat for Protection
To protect your paint or decals from chipping or peeling, apply a clear coat over the painted surface. This will ensure that the finish remains intact, even with frequent use and exposure to the elements.
10. Safety Precautions
While building your own custom landing gear can be a rewarding and exciting process, it is important to prioritize safety throughout the entire journey.
10.1 Follow RC Helicopter Safety Guidelines
Always adhere to the safety guidelines provided by the manufacturer of your RC helicopter. These guidelines include proper battery handling, safe flying practices, and respecting airspace regulations.
10.2 Securely Fasten the Landing Gear
Ensure that all screws, fasteners, and connections are securely tightened before flight. Loose landing gear components can pose a risk of detachment or interfere with the helicopter’s performance.
10.3 Check for Wear and Tear Regularly
Regularly inspect your landing gear for any signs of wear and tear. Check for cracks, loose connections, or any other damage that may affect its performance. Replace any worn or damaged components immediately.
10.4 Be Mindful of Weight Limits
Keep in mind the weight limits specified by your RC helicopter’s manufacturer. Exceeding these weight limits with an improperly designed or excessively heavy landing gear can negatively impact flight performance and increase the risk of accidents.
Building your own custom landing gear for your RC helicopter is a satisfying and creative endeavor. By understanding the basics, gathering the right tools and materials, measuring and designing carefully, and following proper assembly and testing procedures, you can create a landing gear that enhances the functionality and aesthetics of your RC helicopter. Remember to prioritize safety at all times and regularly inspect and maintain your landing gear to ensure a safe and enjoyable flying experience.
