Are you tired of your drone footage looking blurry and lacking in sharpness? Want to take your aerial videography to the next level? Look no further! In this article, you will discover the best ways to enhance the video quality of your drone footage. From optimizing camera settings to utilizing editing techniques, we will guide you through simple yet effective steps that will elevate the visual appeal of your aerial shots. Say goodbye to mediocre footage and hello to stunning, professional-quality videos!

Choose the Right Drone
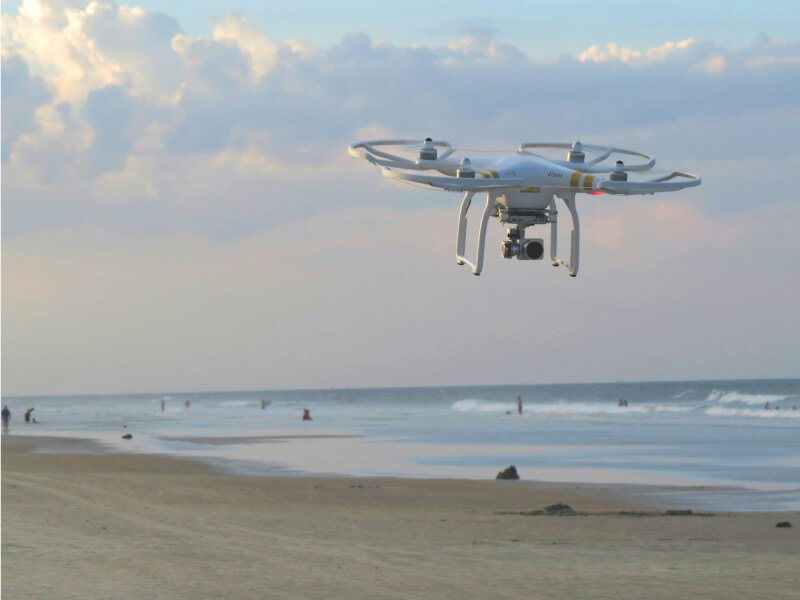
When it comes to capturing high-quality drone footage, choosing the right drone is essential. Consider the camera specifications of the drone you are interested in. Look for a drone that offers a high resolution for video capture, such as 4K or higher. The higher the resolution, the sharper and more detailed your footage will be.
In addition to resolution, consider the drone’s camera sensor size and the quality of the lens. A larger sensor can capture more light and provide better image quality. Look for a drone that has a good lens with a wide aperture for improved low-light performance.
Another important feature to look for is a drone with a gimbal. A gimbal is a mechanism that stabilizes the camera and keeps it level, even when the drone is moving. This is crucial for smooth and stable footage. Make sure the gimbal is of good quality and can handle the weight of your camera.
Lastly, ensure that the drone offers stability and control. Look for features such as GPS and altitude hold, which help to keep the drone steady in the air. A drone with good stability will make it easier to capture steady footage, especially in windy conditions.
Understand Camera Settings
Once you have chosen the right drone, it is important to understand and utilize the camera settings effectively. Familiarize yourself with exposure settings such as aperture, shutter speed, and ISO. These settings determine the amount of light that enters the camera and can greatly impact the overall quality of your footage. Experiment with different exposure settings to find the right balance for the lighting conditions.
Adjusting the white balance is also crucial for capturing accurate colors. Different lighting conditions can cast a color cast on your footage, so make sure to adjust the white balance accordingly. Most drones offer automatic white balance settings, but manual adjustments can provide more control and better results.
Additionally, pay attention to the frame rate settings of your camera. The frame rate determines how many frames are captured per second and can affect the smoothness of your footage. Higher frame rates are ideal for capturing fast-paced action, while lower frame rates can create a more cinematic look.
Lastly, experiment with different picture profiles offered by your drone. Picture profiles can affect the contrast, saturation, and color grading of your footage. Try different profiles to find the one that suits your desired look and style.
Optimize Lighting Conditions
The lighting conditions can greatly impact the overall quality of your drone footage. The golden hour, which is the hour after sunrise or before sunset, offers soft and warm light that can enhance the visual appeal of your footage. Shooting during the golden hour can add a beautiful and cinematic touch to your videos.
On the other hand, shooting in harsh sunlight can create strong shadows and blown-out highlights, resulting in less pleasing footage. If you must shoot during the day, try to find shaded areas or use a diffuser to soften the light.
To balance the exposure between the bright sky and darker foreground, consider using ND (Neutral Density) filters. ND filters reduce the amount of light that enters the camera, allowing you to achieve a more balanced exposure. This is especially useful when shooting landscapes or aerial shots with a wide dynamic range.
When shooting, beware of shadows and reflections. Shadows can create uneven lighting and distract from your subject. Try to position your drone in a way that minimizes shadows. Similarly, reflections from windows or bodies of water can obscure your subject or add unwanted glare. Adjust your framing and angle to avoid capturing unwanted reflections.
Stabilize Your Footage
Stabilizing your footage is crucial for achieving smooth and professional-looking drone videos. Investing in a quality gimbal is key to minimize vibrations and ensure stable footage. A gimbal is a device that stabilizes the camera and compensates for any movements or vibrations of the drone. Look for a gimbal that is compatible with your drone model and offers good stabilization performance.
When operating your drone, use smooth and controlled movements. Avoid abrupt changes in direction or speed, as this can lead to shaky footage. Practice flying in a steady and fluid manner to achieve the best results.
If your footage still has minor shakiness or vibrations, consider utilizing post-stabilization techniques in video editing software. These techniques can help further stabilize the footage and eliminate any remaining imperfections. However, it is always best to capture as stable footage as possible in-camera, as post-stabilization can sometimes result in a slight loss of image quality.
Lastly, be mindful of excessive tilting and panning. While some movement can add dynamism to your footage, too much movement can be distracting and look unprofessional. Use tilting and panning movements sparingly and purposefully to enhance your shots.

Focus on Composition
Just like in traditional photography, composition plays a vital role in creating visually appealing drone footage. Practice the rule of thirds by mentally dividing the frame into a grid of nine equal sections and placing your subject at the intersections or along the lines. This technique can help create a balanced and visually pleasing composition.
Creating depth and visual interest in your footage is also crucial. Incorporate foreground, middle ground, and background elements to add depth and dimension to your shots. This can be achieved by framing your subject in a way that includes elements in the foreground, such as trees or buildings, to add a sense of scale and perspective.
Additionally, framing your subject appropriately is important. Find interesting angles and perspectives to showcase your subject in a unique way. Experiment with different camera positions, heights, and distances to find the most engaging composition for your footage.
Enhance Post-Processing
Post-processing is a crucial step in improving the video quality of your drone footage. Shooting in a flat or log picture profile allows for greater flexibility during the editing process. A flat or log profile preserves more dynamic range and allows for better control over exposure, contrast, and color grading.
Adjusting the exposure, contrast, and saturation can greatly enhance the visual appeal of your footage. By increasing or decreasing the exposure, you can fine-tune the brightness of your footage. Adjusting the contrast can add depth and make your footage pop, while saturation controls the intensity of colors.
Applying sharpening and noise reduction can help improve the overall sharpness and clarity of your footage. However, be careful not to overdo these adjustments, as it can result in unnatural-looking footage.
Color grading is another powerful tool to enhance the mood and style of your footage. Experiment with different color grading techniques to achieve the desired look and feel. This can help add a cinematic touch or create a specific atmosphere in your videos.

Pay Attention to Camera Movements
Camera movements can greatly enhance the visual storytelling in your drone footage. Mastering the art of smooth transitions is key to achieving professional-looking results. Smoothly start and end your camera movements to create seamless transitions between shots.
Use cinematic camera techniques such as tracking shots, dolly shots, and crane shots to add visual interest and dynamics to your footage. These movements can create a sense of movement and draw the viewers’ attention to specific elements or subjects.
Combining different camera movements creatively can also contribute to the overall quality of your footage. Mix aerial shots with ground-level shots, or combine tracking shots with upward or downward movements to add variety and engage your audience.
Avoid jerky or abrupt changes in direction, as this can be disorienting and detract from the smoothness of your footage. Practice controlling the speed and intensity of your camera movements for a more polished result.
Consider the Background
Choosing visually appealing locations can greatly enhance the quality of your drone footage. Look for interesting landscapes, architecture, or natural elements that will add visual interest to your videos. Plan your shoots to include these visually striking locations.
Avoid busy or distracting backgrounds that may draw the viewer’s attention away from your subject. Look for clean and uncluttered backgrounds that will allow your subject to stand out. Pay attention to any potential distractions in the background and adjust your framing or composition accordingly.
Similarly, pay attention to foreground elements that can add depth and dimension to your footage. Incorporating elements such as trees, buildings, or people in the foreground can create a sense of scale and perspective. Experiment with different framing and angles to find the most visually appealing composition.
Lastly, keep an eye on the horizon line. Make sure that your footage is level and the horizon is straight. A tilted horizon can make your footage look amateurish and distract from the overall quality of your video.

Capture Properly Exposed Footage
Properly exposing your footage is essential for achieving high-quality drone videos. Utilize the histogram provided by your camera for exposure guidance. The histogram is a graph that displays the distribution of brightness levels in your footage. Adjust the exposure settings to avoid overexposure (when the graph is pushed to the right) or underexposure (when the graph is pushed to the left).
Avoid relying solely on the automatic exposure settings of your drone, as they may not always provide the desired results. Experiment with manual exposure settings to achieve the perfect balance of highlights and shadows in your footage.
Balancing the highlights and shadows is crucial for retaining details in both bright and dark areas. Try to avoid losing details in the highlights, as this can result in blown-out or overexposed areas. Similarly, make sure to retain details in the shadows, as underexposed areas can appear as dark blobs without any details.
Utilize the metering modes offered by your camera effectively. Metering modes measure the brightness of different areas in the frame and help the camera adjust the exposure accordingly. Learn how to switch between different metering modes, such as spot metering or evaluative metering, to achieve the desired exposure in different shooting situations.
Take Care of the Technical Details
To ensure the best video quality, it is important to take care of the technical details of your drone and equipment. Ensure that you have sufficient storage space on your memory cards to avoid running out of space during filming. High-resolution video files can take up a significant amount of storage, so it is important to have enough space to capture the footage you desire.
Invest in high-quality memory cards that have a fast write speed. This will help ensure smooth recording and prevent any dropped frames or glitches in your footage. Look for memory cards with fast read and write speeds, such as Class 10 or UHS-I, to handle the data transfer required for high-resolution video recording.
Keep your drone’s firmware up to date. Manufacturers regularly release firmware updates that can improve the overall performance and stability of your drone. Check for any new updates and follow the instructions provided to ensure that your drone is running the latest firmware.
Maintain optimal battery performance by following the manufacturer’s guidelines. Make sure to fully charge your drone’s batteries before each flight and avoid leaving them fully discharged for extended periods of time. Proper battery maintenance can help prevent sudden power loss during filming and ensure a consistent power supply throughout your flights.
By considering these technical details, you can avoid any potential issues that may affect the video quality of your drone footage and have a seamless and hassle-free filming experience.